Your Guide to Volvo D13 Coolant Reservoir: Maintenance, Inspection, and Replacement
Introduction to Volvo D13 Coolant Reservoir
The introduction to any article is essential to engage the reader and set the tone for the rest of the content. In this chapter, we will discuss the basics of the Volvo D13 coolant reservoir, including its purpose, importance, and function in the engine’s cooling system.
The coolant reservoir is an essential component of the engine’s cooling system, storing the coolant and releasing it back into the system when needed. The Volvo D13 engine, like any other engine, generates a lot of heat when in operation, which can cause significant damage if not properly managed.
Therefore, it’s crucial to maintain the coolant reservoir regularly to ensure that the engine remains within its optimal temperature range. Neglecting the coolant reservoir can lead to overheating, engine failure, and costly repairs.
Throughout this chapter, we will also introduce the Volvo D13 engine and its cooling system, providing a foundational understanding of how the engine operates. Understanding how the coolant reservoir fits into the engine’s larger picture will help you appreciate its importance and make informed decisions when it comes to maintenance and replacement.
Signs of a Faulty Coolant Reservoir
In this chapter, we will discuss the signs of a faulty coolant reservoir, which is critical to identify early on to prevent any potential damages to the engine.
One of the most common symptoms of a failing coolant reservoir is a low coolant level, which may indicate a leak or a crack in the reservoir. Another sign of a faulty coolant reservoir is coolant leaks, which may be visible as puddles of coolant underneath the engine or a sweet-smelling odor coming from the engine bay.
Other symptoms of a faulty coolant reservoir may include overheating, engine misfires, and reduced engine performance. These symptoms can indicate a variety of issues, but a faulty coolant reservoir is one potential cause that should not be overlooked.
If you notice any of these symptoms, it’s crucial to take your vehicle to a professional mechanic for inspection immediately. Delaying repairs can lead to further damages and costly repairs down the line.
In the next chapter, we will discuss how to inspect the coolant reservoir and identify any faults in the system.
How to Inspect the Coolant Reservoir
In this chapter, we will discuss the steps to inspect the coolant reservoir properly, ensuring that any faults or issues can be identified early on and addressed promptly.
Before inspecting the coolant reservoir, make sure that the engine is cool and the vehicle is parked on a level surface. It’s also a good idea to wear gloves and protective eyewear to prevent injury.
The first step in inspecting the coolant reservoir is to visually check the coolant level. The reservoir has a “max” and “min” line, indicating the optimal coolant level. If the level is below the “min” line, it may indicate a leak or a crack in the reservoir.
Next, inspect the reservoir for any visible cracks or leaks. These can often be spotted by visually inspecting the reservoir’s exterior, including its hoses and connections. Any cracks or leaks should be addressed immediately to prevent further damages to the engine.
Finally, check the reservoir’s color and consistency. Coolant should be green, yellow, or pink, depending on the type of coolant used. If the coolant appears brown or milky, it may indicate a problem with the engine, such as a blown head gasket.
By inspecting the coolant reservoir regularly, you can identify any issues early on and prevent costly repairs down the line. In the next chapter, we will discuss the steps to replace a faulty coolant reservoir if necessary.
How to Replace a Faulty Coolant Reservoir
In this chapter, we will discuss the steps to replace a faulty coolant reservoir, which is necessary to ensure the engine’s optimal performance and prevent further damages.
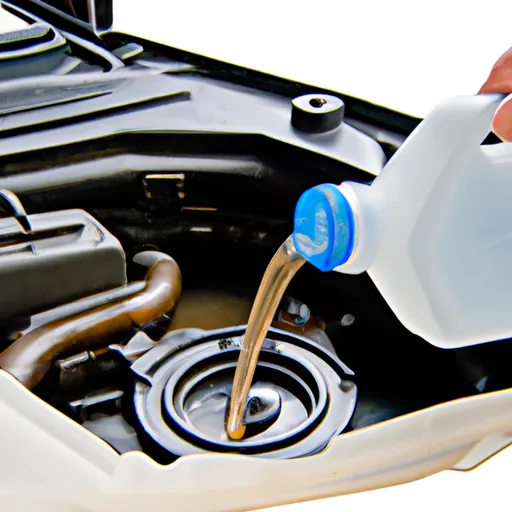
The first step in replacing the coolant reservoir is to drain the coolant from the system. This is typically done by opening the drain valve on the bottom of the radiator and allowing the coolant to drain into a catch basin.
Next, remove the old coolant reservoir from the engine bay. This typically involves removing any hoses or connections from the reservoir and then unscrewing it from its mounting location.
Once the old reservoir is removed, install the new coolant reservoir by reversing the removal process. Connect any hoses or connections to the new reservoir and screw it into its mounting location.
Finally, refill the cooling system with fresh coolant, following the manufacturer’s specifications. Start the engine and allow it to run for several minutes, checking for any leaks or abnormalities in the system.
It’s important to note that replacing the coolant reservoir can be a complex process, and it’s often best to leave it to a professional mechanic. Attempting to replace the reservoir yourself without proper knowledge and tools can lead to further damages and costly repairs.
By properly maintaining and replacing the coolant reservoir as needed, you can ensure that your Volvo D13 engine remains in optimal condition and continues to perform reliably.
Preventive Maintenance for Your Coolant Reservoir
In this chapter, we will discuss the preventive maintenance steps you can take to ensure the longevity and optimal performance of your coolant reservoir.
One of the most important preventive maintenance steps is to check the coolant level regularly. This can be done by visually inspecting the coolant reservoir and ensuring that the coolant level is within the “max” and “min” lines. If the level is low, add the appropriate coolant to the reservoir.
Another crucial preventive maintenance step is to inspect the coolant reservoir for any visible cracks or leaks. These can often be spotted by visually inspecting the reservoir’s exterior, including its hoses and connections. Any cracks or leaks should be addressed immediately to prevent further damages to the engine.
Additionally, it’s essential to replace the coolant reservoir as needed, typically every 100,000 miles or as recommended by the manufacturer. Over time, the reservoir may become brittle or develop cracks, which can lead to coolant leaks and engine damage.
Finally, it’s important to use the correct type of coolant for your vehicle, as specified by the manufacturer. Using the wrong type of coolant can lead to engine damage, so it’s crucial to follow the recommended specifications.
By following these preventive maintenance steps, you can ensure the longevity and optimal performance of your coolant reservoir, preventing costly repairs down the line and ensuring that your Volvo D13 engine runs smoothly.
For detailed information, you can contact us at torqueusa.com.
